>
YAMAHA
STRINGS
SS-30
RACK-MOUNTED WITH MIDI
MIDI STRINGS

Friday, July 06, 2018

Connections & Controls

I decided to write down a simple list of all the front-panel, rear-panel and power supply unit controls and connections.

This post will be draft until the SS-30M is complete. I might still chnage my mind about a few things!

All items function as on the original SS-30, unless marked as follows:
* New feature - not found on SS-30
** Modified feature - enhancement to SS-30 functionality (e.g. switch is now variable)
*** Supplemental feature - Not required on SS-30 (e.g. external PSU connections)

Front-panel

  1. Pitch
  2. Detune
  3. Pitch CV Input*
  4. Vibrato Delay
  5. Vibrato Depth
  6. Cello 1 Level**
  7. Cello 2 Level**
  8. Cello Attack
  9. Cello Sustain
  10. Cello Brilliance
  11. Keyboard Split
  12. Viola Level**
  13. Violin 1 Level**
  14. Violin 2 Level**
  15. Violin Attack
  16. Violin Sustain
  17. Violin Brilliance
  18. Orchestra Speed**
  19. Orchestra Feedback*
  20. Cello Orchestra Mix**
  21. Violin Orchestra Mix**
  22. Orchestra External Signal Input*
  23. Volume
  24. Power Switch

Rear-panel


  1. Main Output
  2. Cello Output*
  3. Violin Output*
  4. Foot Control. Volume
  5. Foot Switch. Sustain
  6.  MIDI In*
  7. MIDI Thru*
  8. MIDI Expression Output*
  9. Mains Power Switch Loop***
  10. Power Input

PSU 

  1. Mains Input
  2. Pilot Lamp
  3. Fuse Holder
  4. Main Voltage Selector
  5. Mains Power Switch Loop***

Monday, June 18, 2018

Make Like A Banana - And Keyboard Split

Let's Split

 There are two voice groups on the SS-30 - Cellos and Violins. There are 49 keys with corresponding keying circuits which provide attack and sustain envelopes. However, it's possible for more than 49 notes to be generated in the SS-30. There are a maximum of 25 notes of the Cello voice and a maximum of 49 notes of Violin. Those of you who have studied mathematics at the very highest levels may have started to see that there is a problem with this arrangement. It has crossed my mind that building another two K boards would solve this problem, but the eminent designers of Yamaha Nippon Gakki are not totally wasting notes. So, what is going on?

The keyboard split rotary switch selector on the SS-30 is numbered. Each split point being given an integer corresponding to the markers just above the keyboard. But what do they represent? Well, as the User Manual,explains:
"Switching this section changes the position of tones of Cello and Violin systems.
There are marks
on the panel above the keyboard, so that each point of 1, 2, and 3 may be noticeable during playing"
Actually it's got a huge typo in and repeats some of that which makes it hard to read. It 's also says the marks are on "the keyboard (the panel)".  But that's what they meant to say.


Things become clearer with the following description.


 Right. And so...
"The KBD.SPLIT enables you to produce
chords of the Cello and melodies of Violin by your left and right hands respectively."
 Exactly! It does seem a shame that I couldn't just get all 75 notes at one and the same time, but it's not that they actually all exist at once. Why not?


Gating Away With It


This diagram shows how each K and G board is used for each split.


Except it isn't even as simple as that. The G boards have 4 outputs each which are mixed or rearranged depending on the voice selected.


The key to all this is the split gate.

This is the schematic, but it's not terribly helpful.


What's happening is the outputs of the G boards are being switched on or off. Which sounds simple, but there is a lot going on here. There are 6 inputs but 9 outputs. Two of the inputs are from G1 and the others from G2, where most of the switching action occurs.

This, from the  Block Diagram, is a bit easier to follow.


But combining them both with additional information about the way the voices are put together yields this:


As you can see, you never have all the the outputs from both G boards on at the same time.

It's still a bit hard to follow though, so here it is with the voices grouped together.


Now it's clear!

Cello and Viola use the exact same G1 and G2 outputs as each other, but not at the same time.  The split gate sends those outputs to different filters to convert the raw output to become either Cello or Viola. There's nothing fancy about these filters! But that's for another post.
The Violin is ON at the same time as the Viola, obviously, and it uses the other outputs from G1 and G2.
This whole thing could be simplfied if the split was reduced to either Cello on or Cello off, of course. However, it's a versatile solution and I've no desire to change it.

Splitting My Sides


As I thought more about the split control and where to place it on a the SS-30M panel, I came up with this rearranged front-panel for the SS-30. It places the split in-between the two sets of voices.


The main problem with this design is that the Keyboard Split is going the wrong way! All the way to the left means no Cello and all to the right is all the Cello on. Can that be improved?

The switches positions can be marked up in any way you like, as long as they are in the same rotational order. This version inverts the control so it balances the other way.


This fails in two ways though, because having the knob upside down is unnatural - our hands not naturally designed for this kind of 'twiddling'. The leverage is also naturally top-side. Mostly though, it makes less sense in aligning with the keyboard.

This is the current alignment

 And this is inverted


OK. But that is a nonsense because I simply rotated the drawing! What needs to happen is that the switch is rotated but the markers are kept at the top and reordered. Except that comes to exactly the. same thing as before but the switches action is upside down! Oh.

I have another solution for this though. There is a long tailed knob from the B-75 donor that is like a one-sided chicken-head knob, but with a very long tail. These were designed so that you could easily move them without changing your hand from a fingering position to a grip. Using this control serves two purposes. It makes the rather stiff switch easier to rotate, due to the extra leverage. It also means that the pointer can still be aligned to the split points on the keyboard but the arm points to the balance of Cello and Violin.

Kind of like this:


With rack panel layout, it can be more obvious what voice is being pointed at by the long tail.

Except now that there keyboard markers have gone I need to swap the numbers for the actual notes, like so:

Split - The Difference


Much better! But, there is a centrality to this element now, so that anything on the same vertical axis, or group, is inclined to be grouped in common with it. The point of moving it in between Cello and Violin is to control the balance between them. Otherwise the pointers of the longer control become confused. Its location is either between, with the longer pointer, or it's location is almost arbitrary and the knob can be smaller.

That's great, but there could be a problem of space. The control takes up far more room now and the layout demands more separation.

Ideally there would be a control that is common that could also be in the centre. Pitch and vibrato are but that is a lot of controls to fit in. This will take some thought...


Sunday, June 17, 2018

Pitch CV Input Test

I've got a lot of irons in the fire at the moment and I can hardly keep up with the blog! Today though I got busy with Lightworks and finished another demonstration video.

Anyway, a week or so ago I hooked up a pitch CV input. The pitch control knob is a simple voltage divider between +15 and -15 volts. Therefore it's approximately 0V when it's centred and tuned.

The vibrato input is a smaller voltage though.


This LFO signal and the tune, detune controls are mixed together to provide a pair of control voltages for the two master oscillators. The vibrato is a balanced alternating current so the pitch swings up and down around the centre level set by the main pitch tuning.
The Vibrato depth control is another voltage divider which sets how much of the Vibrato LFO is added to this mix.
For the external control voltage input I simply inserted a signal in place of the Vibrato LFO.
For this test I needed an LFO and the most convenient tool at my disposal was a Roland Bitrazer. The Roland Aira EFX modules can be customised with an application and various virtual modules are available. All I needed was this LFO.


I used my scope to tweak the levels to match those of the Vibrato LFO and tried it out.


I've added captions so you know what waveforms the LFO is outputting at each point. The adjustments on the Bitrazer itself are to set the depth level of the signal. The other tweaks on the iPad are changing the LFO rate. 

In conclusion, this makes far more versatile vibrato effects possible. It could even be used for pitch bend effects. It's limited by the range of plus or minus one semitone, but that's OK. It's a worthwhile addition.

Monday, June 04, 2018

Screen Printing

Joy unconfined! I have found a screen printer in the UK who can give me the front-panel of my dreams.

Screen Dreams

Last week I was on holiday and, with time to think, I once again returned to my desire to have a really great looking front-panel. It was the one thing my mind kept returning to as being unsatisfied by my current plans. Well, that and the fader knobs, but mostly the quality of the printing. As an inveterate Googler I started to scratch away at the itch.

I started by looking around at how screen-printing is done. The process is well documented, but to do it to a high degree of precision is not what you tend to find Instructables for. People do this for DIY synthesizers, but it's not for the faint of heart. Clearly, for a one-off job, I don't want to invest the time or resources in doing this. Let alone doing it perfectly. Once only being a tall order for any kind of skill. Yes, I might do more projects but this isn't a skill I savour the opportunity to learn. The opinion also seems to be that, whilst this is a process which you want to have done for you, it is difficult to find someone and is likely expensive.
However, as I said, I have found someone And quite easily, and for a cost which is reasonable. When I saw the comments about cost I wanted to know how much. Would it really be too much? I Googled 'screen printing one-off metal UK'. and the first result was http://www.21stcenturyscreenprinters.co.uk/.

Clicking on their Metalwork link brought up some (rather grainy) photos of synthesizer panels! There was a link to see more photos and I quickly clicked through to a wonderful sight (and site). Customsynth. https://www.flickr.com/photos/customsynth/

Another Satisfying Custom Synth

The Flickr photostream is rather lovely - lingering over tons of desirable gear is a difficult habit to give up, but lacks a bit of context. Another search led me to this Music Radar interview with the man responsible - Jeff Toman. And also this I Heart Synths interview too. If you need a major renovation or custom look for a world tour, Jeff is your man!

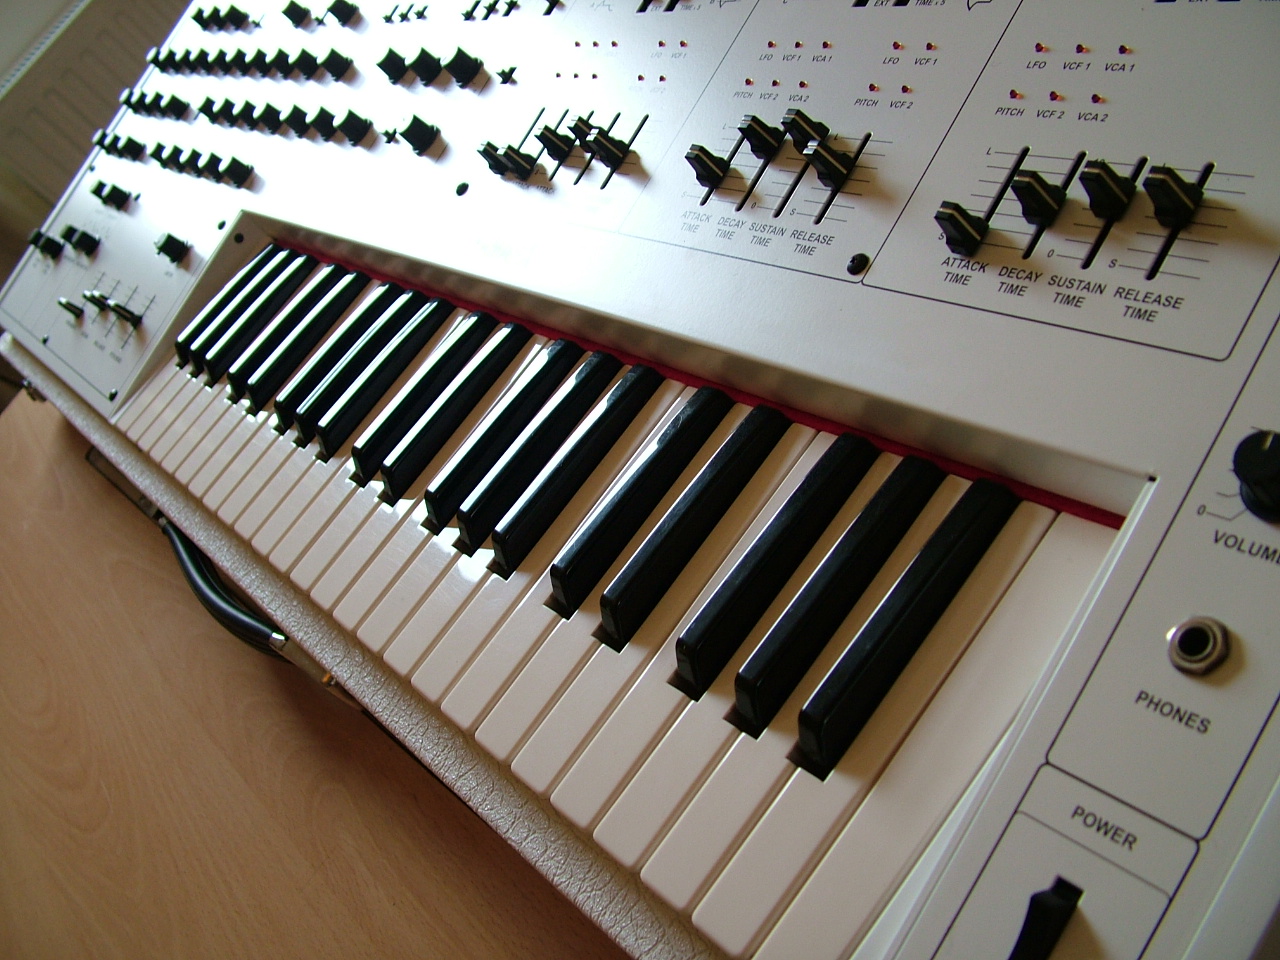
One of the most interesting examples, for me, is this Yamaha CS-30L https://www.flickr.com/photos/customsynth/albums/72157626458930565/with/5742061577/


DSCF3990

This is a synth that is normally in black, of course, but it has the same knobs I'm using and you can see the great care that has gone into getting the graphics just right. Just as I intend to!

Print Screen

Back to 21st Century Screen Printers

"21st Century Screen Printers have specially adapted printing machine specifically for printing directly onto metal plates and fascias. We can also print directly onto chassis sections of any height and angle."
Jeff mentions that they used to do the panels for the Joe Meek branded studio gear. So, it's professional grade stuff!

I have been in touch and, as I said, the price is well within budget, so my plan is to get the panel cut and coated by Schaeffer and then printed by 21st Century. I just need a design now...

Knobs, Sliders and Switches

Parting out

As you may remember I bought an organ. And now I have a  collection of parts.

For the front panel I now have a few more original Yamaha parts to use and although can't find exactly what I would like, I think I have what I need now.

The Knob-le Art

Last year I decided to buy some original Yamaha knobs. These probably came from a mixer but they are the same as used on the CS-5, 10, 15, 30.


These fit the same knurled shaft potentiometers as used on the SS-30.
They need a bit of clean-up - see below

As I have 12 of these, they will form the bulk of the rotary controls.


The B-75 organ has, sorry, had, a few knobs too, so I have options to use different knobs for different functions.


There are two of these small knobs


One is from a dual-concentric control which was used for Volume/Balance but could be used for Pitch/Detune.


And there are two larger knobs.


Letting Things Slide


The B-75 also has a bunch of slider controls. 

The slider caps are 14x18mm and 11mm high


They also sliders come with these natty covers.


The dimensions are

External 42x19mm
Internal 39.90x16.8mm - for cut-out

opening 28x2.4mm
Slider travel 25mm

inner dimension 36.6x13.3

The tabs are to hold it through a depth of 13.8mm

A possible slider to use with this is: Bourns - PTA2043-2010DPA103 35x9mm, 20mm travel. The original sliders travel is 25mm though. 

This is the main issue with these panel covers - they are quite a small range of travel and I canlt find anything that fits it exactly. The original potentiometers aren't suitabel either, so I might not use them in the end. 


Washing The Pots 

All these old control knobs were a bit grubby, so I gave them a wash.


The New Switcheroo


As noted back in the Attack Formation post I only need switches for the attack control because everything else can be controlled with variable resistors. When I got the organ I was particularly after these switches.


As you can see though, they seem to have had some sort of incident and needed a clean.


In fact the switches were broken. The springs had completed correded.


Luckily the caps come off easily and other switches on eth organ were in fine condition. The desoldering was particularly easy too.


Dimensions 40x14.5

So, I have my attack switches. I didn't wire these up yet but I buzzed the contacts with my multimeter, just in case.

And I also have a power switch


Friday, June 01, 2018

Now with MIDI!

Last September I may have mentioned that the SS-30M is now functional. That's to say, the MIDI interface is fully wired up and it works. Mission accomplished! Err, well, the MIDI part is.

Shortly after that milestone the nights closed in and all work ceased. But I did say there would be a video of it all working. Well, I'm pleased to say that this May Day bank holiday weekend the weather has been as sweet and warm as a the sound of an analogue synthesiser. With my usual trepidation I powered up the old monster and was glad to hear it was all working as before. Well, almost. The highest A sharp was pulsing on and off because a transistor had been pushed over and was shorting. And the Violin section only works if the Orchestra section is on, but that's just a bit of a bother with the switch.

Here then is a short bit of unrehearsed and barely thought through keyboard playing. The Yamaha PSS-580 is the MIDI keyboard.


Wow, eh?

Well, I will think of some more interesting things to play on it, but you get the idea. It works!

I also had time to measure the current on the +15V rail. It seems that I will be able to use the existing supply for the MIDI interface too! Hooray! I have another post in the draft folder all about how to have the power supply in a separate unit. Hang on to your hats!


Saturday, May 26, 2018

Individual Outputs

In the Amazona.de article by Costello, my interest in modifications was piqued by his desire to have individual outputs for each voice - Cello and Violin.

"Then you could combine almost dry cellos with "wet" strings. Even for wacky phaser and flanger effects would offer a separate decrease. Unfortunately, it is not. As a real chorus fetishist, I like to use the boss chorus CE1, which has the charm that the chorus pulls the signal into the stereo width. And of course, the Yamaha SS-30 sound also blends in beautifully with a nice phaser like the Electro Harmonix Small Stone or MXR-100. But you can also experiment with flangers and Leslie effects. And a good reverb is of course mandatory."

How can I do that? Easily, actually.

Butcher's Blocks

 Sometimes a modification requires a certain amount to of butchery - removing and replacing parts and so forth. Other jobs are a simple matter of adding a wire.

Below is a section of the SS-30 block diagram.


 All the outputs from the G boards are mixed together in the first block. These sub-circuits are call 'Mixing Amp and Filter' and produce Violin, Viola and Cello voices. These create the five voices available to select on the front panel switches.

The next block contains two 'Pre-amps' which actually just mix the five voices into Violin and Cello which are then set to the 'Brilliance'filter control.

The final block you can see here contains a pair of buffers, which are common-collector amplifiers. After the these buffers, the two voices are switched and mixed, without buffering, for the Orchestra effect.
In other words, after the buffers the two signals are combined and if I try and tap off individual outputs here they won't be, well, individual.

Buffer Zone 

Therefore the ideal place to obtain the individual voices from is just after the Brilliance filter and before the buffers. The outputs will still be subject to the Brilliance setting and not mixed, which is perfect. And, because the signals go through the Brilliance controls there are already wires going back from these potentiometers and easy access to the signals.


Which it are - line-level man!

What's less clear from the diagrams above is the voltage levels at each stage. For the individual outputs I need line-level audio, like the main output.  But what is that level and what is line-level anyway?

The SS-30 manual quotes the output level as:  

OUTPUT . . . . . . . . . -20dB/600Ω

And here's the schematic of the output.  


600 Ohm isn't a standard resistor rating so the circuit designers used the nearest - 560 Ohm.

Up-to the late seventies professional audio was based on telephone standards. 600 Ohm was the stated used for that equipment such that the output impedance (in-line with the signal) matched the input impedance (across, and in parallel with the input terminals). For transmission over long distances this was necessary but eventually this was abandoned for audio.

The units of measurement were for mW of power expressed in decibels as dBm. In this scheme 0dB is 1mW of pow err into a 600 Ohm load.
The SS-30's "-20db" will no doubt mean -20 dBm, which is 0.01mW into 600 Ohm. Again, that's useful for transmission over wires miles long, but just confusing for audio electronics, where the voltage is what matters. Still, they stuck with it for professional audio and made it even more confusing by using dBu. Electronic and communications engineers (like me) use dBu for mico-watts power (u being the greek letter mu, the prefix for micro) but audio engineers call dBu - decibels unloaded.

Here's what Wikipedia says:

"The decibel unloaded reference voltage, 0 dBu, is the AC voltage required to produce 1 mW of power across a 600 Ω impedance (approximately 0.7746 VRMS)."

Which is to say, it would be delivering 1mW into a 600 Ohm load, if you still had such an input. The voltage for 0dBu is 0.775VRMS though, no matter what the input load.

Taking the load off

When the 600 Ohm standard was dropped it was replaced by so called impedance bridging. In this scheme the input load impedance is much higher than the output impedance. This means the voltage is maintained whilst not sourcing so much current from the output. More current means more power but that's not what is needed.
The higher impedance at the input reduces the current load carried from the output to such a degree that it is considered unloaded - hence dB unloaded, dBu.

So what is the voltage of the SS-30 output? Well as the wattage of -20dBm is 0.1mW, which is one tenth the reference wattage of 1mW the voltage is one tenth  the refernce  - 0.0775V RMS or 0.11 V peak and 0.22V peak to peak.

That seems low but the reference level is, well, it's a reference. It's based on a sine wave, not necessarily a good indication of the noises coming of a synth.

Wait, what was I talking about?

Individual outputs

The voices each have pre-amps before the buffers and the output level here is significantly higher than the main output.
This is to be expected. Although there are amplification stages after this point, there is a fair bit of loss to make-up, so it needs to start at a much higher level.

When I measured the signals at this point with my scope I got something like 3 Vpp. i.e 1.5 Vpeak and 1V RMS. That's 2.73 dBu and to bring it in line with the main output it will need a fair bit of output impedance. If a typical line input impedance is 10KOhm then to reduce the level down to the same as the 0.11 V RMS of the main output I will need an output resistance of 10 times 10KOhm.

Well readers, I didn't think about any of that when I was trying this. No, I just tried a few resistors out until I got a level that sounded about the same as the man output. It was 100KOhm so it looks like my post-hoc analysis was right! 

Just putting it out there.

Individual outputs are a cinch, so this modification in definitely in. When I was experimenting I also detected a difference in the sound. The tone was clearer, as you might expect, but the attack also seemed sharper. At least that's how it seemed. I'd like to test it again and make sure I wasn't fooling myself.

Sources


https://en.wikipedia.org/wiki/Line_level
https://www.soundonsound.com/techniques/understanding-impedance
https://en.wikipedia.org/wiki/Impedance_bridging
https://www.soundonsound.com/forum/viewtopic.php?p=222528


Monday, May 21, 2018

Thanks For Your Input!

Putting in the input


Some things are just too easy and you wonder why you didn't just do them earlier. Attaching an external input to the Orchestra effect is one such job.

Referring back to the modification I did to the switches and depth control to have individual wet/dry mix controls for each voice...


I simply added a wire to the Violin voice's input to the mixing amp and switched off the Violin voices for good measure. I haven't replaced the Violin switches yet and I just wanted to isolate the external input as much as possible.

And, hey presto, I have a chorus effects unit!

Because the PSS-580 sounds relatively poor and because I had it to hand I filmed a demo of it with a few different presets to show how useful the effect is.
 This film is a multi-camera wonder! You can see me playing the'580 and adjusting the effects-send at one and the same time! I also downloaded Lightworks so I could superimpose them together.

The channel on the right is the PSS-580. The one on the left is the SS-30. By using the mixer I can also feed the SS-30 back into itself. This creates an even deeper effect. As you get closer to the point of howl-around you get some interesting artifacts around the attack portion of sounds too. A couple of times I push it too far.


Now that this is tested I need to decide how to implement it.
  • Input connector on the front or back panel?
  • Is it worth having an input level control?
  • Should I add a feedback control for the SS-30 so that the deeper effect can be obtained without any external mixing? 
  • Should the external input be routed in with the SS-30 voices or should it just go into the Mixing Amp with it's own channel and 22K resistor?
That was an hour's work on Sunday afternoon so in the evening I decided to try something else with the Orchestra.   

The indications are good

The Orchestra has two LFOs. One fixed at 0.6Hz and the other variable. It occurred to me recently, whilst having deep think about the user interface (of which a blog post is forthcoming), that I could have a blinking light to indicate the rate of the variable LFO. At least now that it's fully variable and not just two fixed speeds it's useful.

The LFO is generated by the IG00150 VCO. This device has two outputs, a sine wave is used for the Orchestra effect and there's an unused sawtooth which I can use to control an LED. 


With a simple transistor driver circuit and borrowing a 15V supply rail I quickly got this demo working.


I would need a small board to hold the components but this is a nice addition to the SS-30M.

Thursday, May 17, 2018

Switching Controls

Earlier this week I sepnt a bit more time fiddling with the front-panel controls.

The first job was to remove the switches I wanted to use from the donor Organ. More on that in a later post.

I also replaced the two Cello voice switches (1 and 2) with faders.


As you can see I hacked them onto my laser-cut temporaray panel. they oinly fitted the gap sideways asnd needed a bit of accommodation. The temp panel's going to be abused a bit whilst I work through this phase of the project.

The faders are from an old mixer (Starsound Dynamix 260) I got from my old high school. I binned it years ago but kept the faders. These are 10Kohm log audio 'A' type and worked perfectly!


Knobs


Here's an old post I put together when I was looking for the perfect knobs to use. I have a solution now, I think but here's the research I did...


Alright! Settle down!
 Yes, we're looking at knobs.

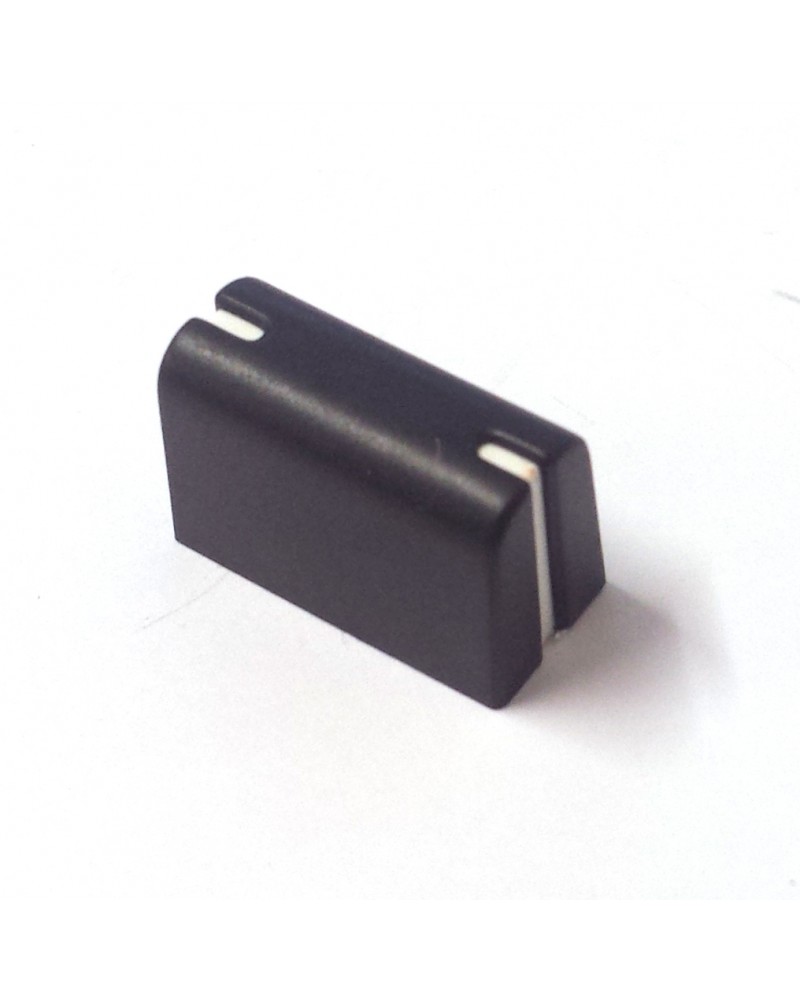
CS/SK style slider knobs 

Where can you get these nowadays?

These exact slider caps are available from http://www.synthparts.com -

"Yamaha CS50/60/80 Slide Pot $12 (larger quadrant type $14)"

That's quite a lot of dosh for some knobs if I get 10 or more, but would be absolutely pukka. I also might feel bad depriving CS owners of precious spares though..


There is a spare part for Numark mixers NS6/NS7 and AKAI APC - PT11106163-  which looks similar, but is possibly a bit bigger and flatter on top.They are definitely textured and matt and not smooth and silky like the original ones.

In context :

AKAI APC40


And then there's the mix slider - PT11106178 - for the 'Numark
V7
MIXDECK QUAD
NDX800
NDX900
NS6 :

NS7
NSFX
This looks rounder but a bit short.

PT11106178


CS style lever switch caps


The switch are caps not so available - except they may be the same as some of the Electone Organs some of which can be bought very cheap, although getting enough of the same colour would be an issue and that's a lot of wastage...
EDIT : I know have a bunch of these lever knobs from the B-75 organ I bought. They aren't quite right for faders though. The sliders have a curved travel.


SK/CS30 style knobs

Right - SK /CS knobs


Perfect Circuit sell SK knobs but they don't seem right at all.  Not U shaped knurls and strange lip on the cap. These are in fact from the Korg MonoPoly - Syntaur sell them too.


Wrong - Korg MonoPoly

Where can I find the right ones? I don't think I will. I've searched high and low and whilst there may be a plastic bin with a dozen sat in a surplus shop in Japan or the States, I can't find them.

Syntaur are our of stock
https://syntaur.com/Items.asp?Item=5093


Here's something with the nearly the right knurling - U shape -  but the base is wrong. I quite like it anyway. I think I have something similar on the back of some speakers I made when I was a lad. There are more sturdy than beautiful.

https://www.quasarelectronics.co.uk/Item/kb0295-19-5mm-6-35mm-control-knob-white-pointer

Mammoth do them too - in different colours - but manufatuer is not mentioned

https://www.mammothelectronics.com/collections/knobs/products/kp-16x15f-series-plastic-fluted-control-knob-16-x-15mm?variant=28794244295

On ebay


CS 15 smaller sliders

Part number CB811290.
These guys seem to do a similar part http://www.shokaifareast.com/Products/Pots/Slide/slide_knobs.htm

Manufacturers

Rogan

Large range - no exact matches though.
http://www.rogancorp.com/knobs-hand-hardware/plastic-control-knobs

OKW

Many and varied
https://www.okw.co.uk/en/Products/Potentiometer-Tuning-knobs.htm

Sifam

Large range of knobs - sliders fairly standard mixer and eq types.
http://www.sifam.co.uk/knobs.asp

Selco

Standard range
https://www.selcoproducts.com/knobs

Cosmo

Standard range.
http://www.cosmocorp.com/en/kcat-main.cfm

Ehc

 Huge range
http://www.ehcknobs.com/index.php?id=CK 


Coolor Caps

Fancy, candy coloured and novelty knobs - single stripe fader knobs, sold in packs too.
http://coolorcaps.com/product-category/caps/


 Even do hydrodip printed ones


Specialised synth shops' knobs

Perfect Circuit

https://www.perfectcircuitaudio.com/accessories/parts.html


https://www.perfectcircuitaudio.com/juno-106-slider-cap.html <- similar to CS/SK slider cap but not rounded.

Syntaur


https://syntaur.com/knobs.html
Have a large number of parts inclusing some real synth classics, not nothing at all for classic Yamaha analogues :-(

Grayscale

Single design - Rogan?
http://grayscale.info/index.php/?s=knobs


http://www.synthparts.com/ <- Have CS50 slider caps
 http://www.vintageplanet.nl/ (Closed)

Organ shops

http://www.mcnsystems.com/parts.htm <-No lists but lots of stuff.


Small Electronics shops

http://www.cliffuk.co.uk/products/knobs/rotary.htm
http://www.surplussales.com/ShaftHardware/Knobs/Index.html 
https://www.tubesandmore.com/products/knobs  <- Guitar stuff mostly
https://www.westfloridacomponents.com/Knobs.html <- not much stuff
http://www.mzentertainment.com/store_dr_zee_workshop_parts_knobs.html - <- Loads but nothing 'right'
http://www.electronicsurplus.com <-quite a bit - bad site though


Wholesale

http://www.ebay.co.uk/bhp/fader-knobs
http://www.aliexpress.com/popular/mixer-fader-knobs.html


General Electronics Shops

https://www.rapidonline.com/knobs
http://uk.farnell.com/knobs


Overall though I want these and I can't get them.